here you find info about how to set up the flokason caruso head feedback stereo cutterhead
V2.10 22.03.2022

important! the last caruso batch was completely sold in january 2022.
we dont plan a new batch of caruso heads at the moment !
but we still have carusopre pcbs. they work great for any feedback cutterhead
we concentrate on professional cutterheads and lathe service at the moment. happy cutting and build your own
do it yourself is king
intro
the caruso stereo head goes back to around 2009/2010 when i had the dream to re-create a new cutterhead.
the last one i did was sc99 in 1999/2000. at this time it was necessary that essential parts are
exchangeable with neumann sx68/74 heads.
With caruso the goal was to leave everything behind and to approach at total new concept.
for example the limitation of a 9mm drive coil diameter was one of the biggest constrains in the old head design.
also new manufacture technology and materials where available.
so caruso was from scratch new. in the beginning even with wild concepts of hall sensor/optical feedback and different
torque tube springs.
also the preamp is an essence of my last 20 years of work in this field.
its maybe the most reduced to max and universal preamp.
its a fine distillate of all the work i did on the vinylium minicut, vc200 , sal74c
and was originally inspired by the compact and wonderful haeco Sd240 amp system.
the goal was a low cost head in the price range of a used grampian but modern with feedback.
neumann stylus mount and strong magnets
and simple interfacing. so a head/preamp preamp was also the idea.
all the mechanical work & development was done with one of the best innovation & engineering companies in switzerland.
all the metalparts are manufactured by the finest mechanical workshops in switzerland
first series was somehow crowdfunded by the first 10 people ordered for 1000$.
so a first initial series started with 25 pcs. starting with Nr.121
started as a non commercial hobby project the amount of energy put into the project was always limited
but nowadays the head is a new standard in low cost stereo cutter heads and many studio use it even on neumann lathes for nice sounding
professional vinyl masters
the quality and consistence is definitely better than any westrex 3D head out today
also the development is not yet finished. there is a 2nd resonance which needs to be eliminated. between 7-12kHz
and i work on better performance from head to head.
but there is already great sound possible and for the little money you get a nice, swiss handcrafted goodie
to cut yoursound into lacquer or polycarbonate.
price. update 01.2019
sorry i have to raise prices at the moment i have a long waiting list suport is quite time consuming and
i prefere to make quality not quantity. so all new orders not already placed and paid please check new prices
CHF 2500 with empty preamp pcbs. diy is needed. parts cost around 150-200.- depending on quality
CHF 2900 with working & tested preamp boards. you still need a case, a +/-15V power supply and a power amp
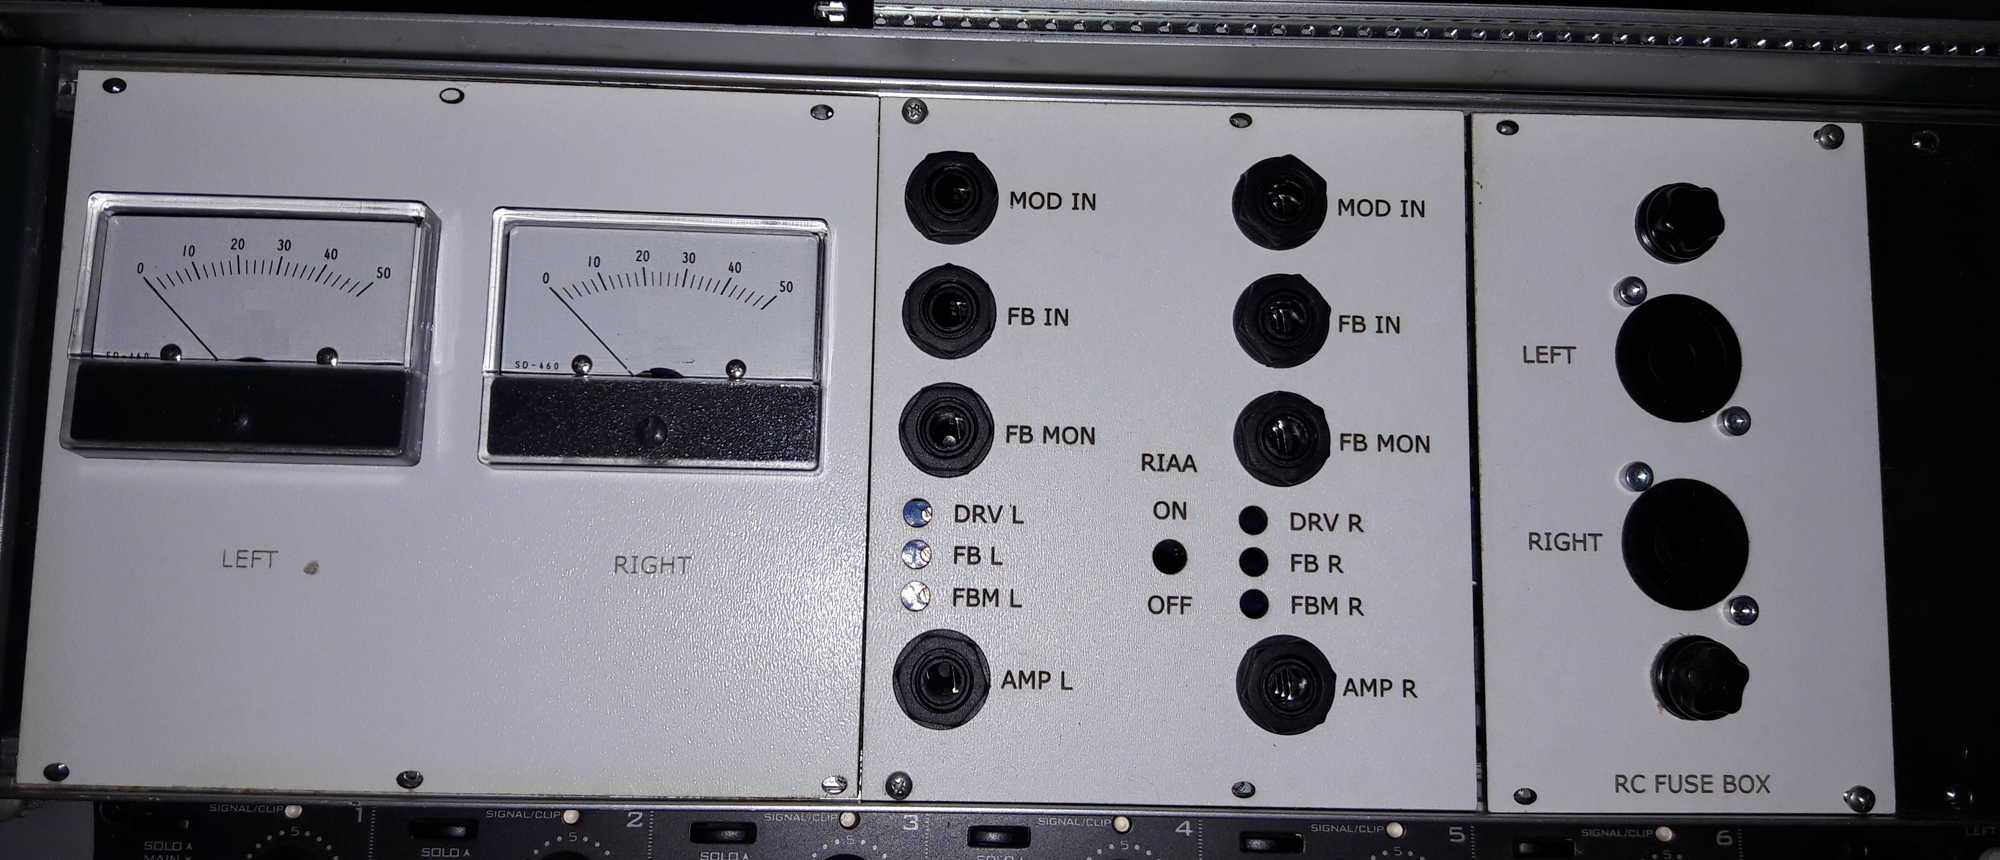
CHF 4900 with complete preamp /power RC-Fusebox amp in case.
cutterhead /feeback cable with neutrik speakon 4 pole for RC-Box is 500.-
RC, fuse relais box prepared for protection is around 400.-
where to hear
there are a few studios out using caruso cutterhead to cut professional vinyl masters
here i put a very unselected and rather random choice.
naxatras lp
all records by arthur joly. pressed at polyson brasil
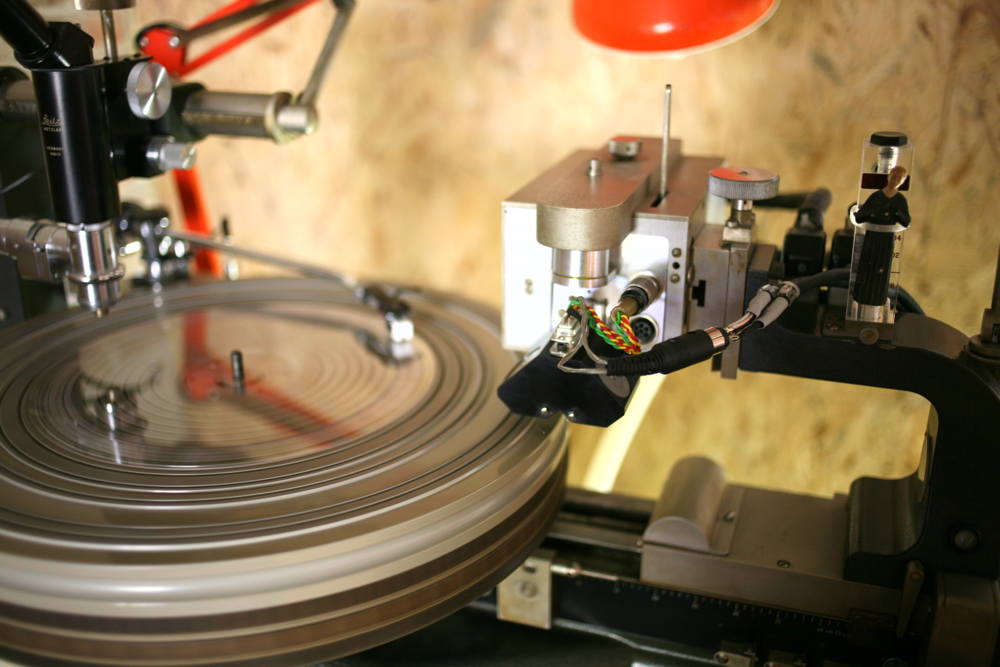
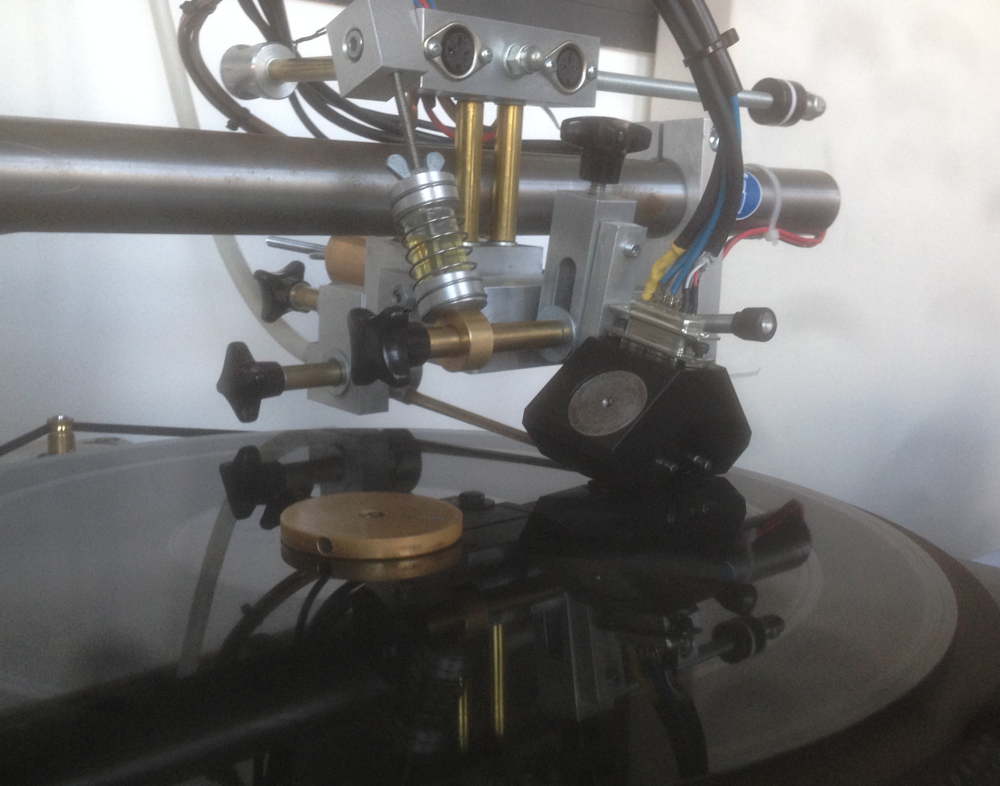
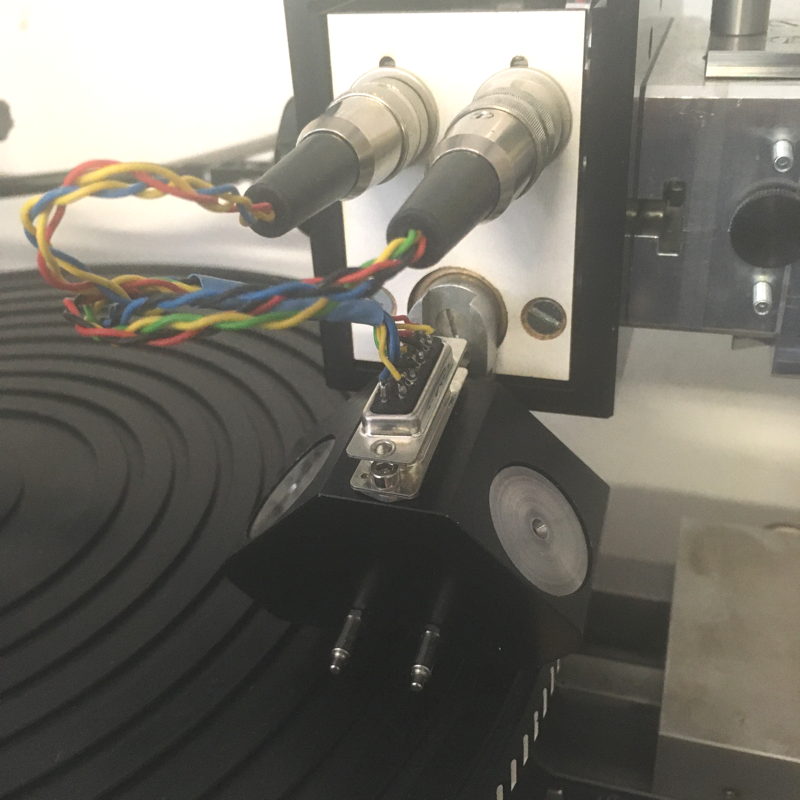
where to see
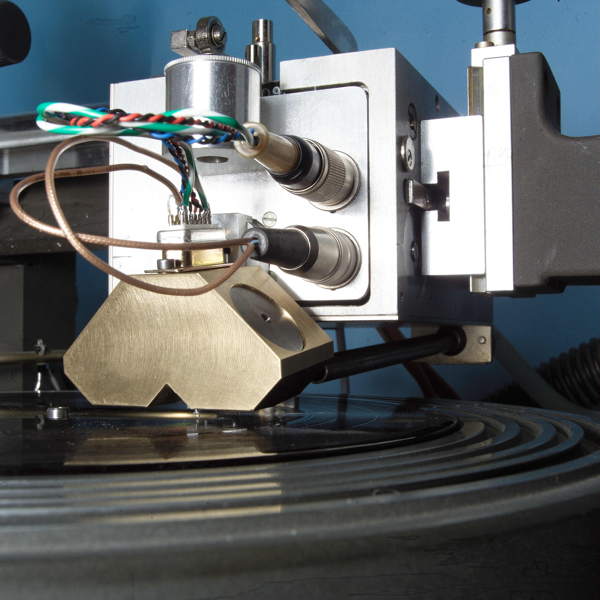
caruso head on highly modified thorens lathe
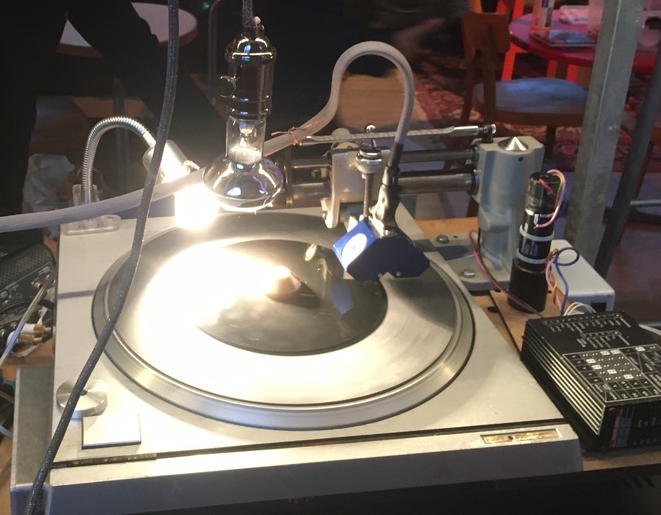
caruso head on neumann AM66, SAL74B amps.
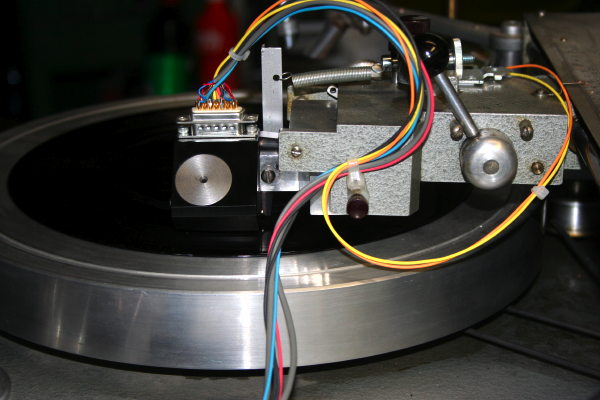
caruso head on custom lathe.
tech data:
Drive coil: 4.7 ohm
FB coil: 9 ohm (early versions 4.7ohm)
resonance frequency: 1100 Hz* depends on version matched to +/10Hz channel
Drive /FB magnets: NdFeB
excursion:> +/- 150um . typ +/-200um.
stylus mount: 1:20 cone like neumann sx68/74 . vinylium sc99
stylus angle: 15 degree. 7 degree in torque tube. 8 degree back angle piece. neumann standard
weight: approx 250 gramm (alu version)
body material: black anodized aluminium. full frame.
head mount: 8mm flat clamp. or 18mm round for neumann box
freq. range: 10Hz-20kHz* (-0.5 dB /-2 dB). upper range heavy depends on drive amp,cabling and input filter on caruso preamp
recommended Feedback at 1kHz: approx. 26dB depending on drive amp
recommended fuse: 0.5A slow blow. select pairs and check for low fuse resistance. <=0.2 ohm
serial numbers: 121 upwards.
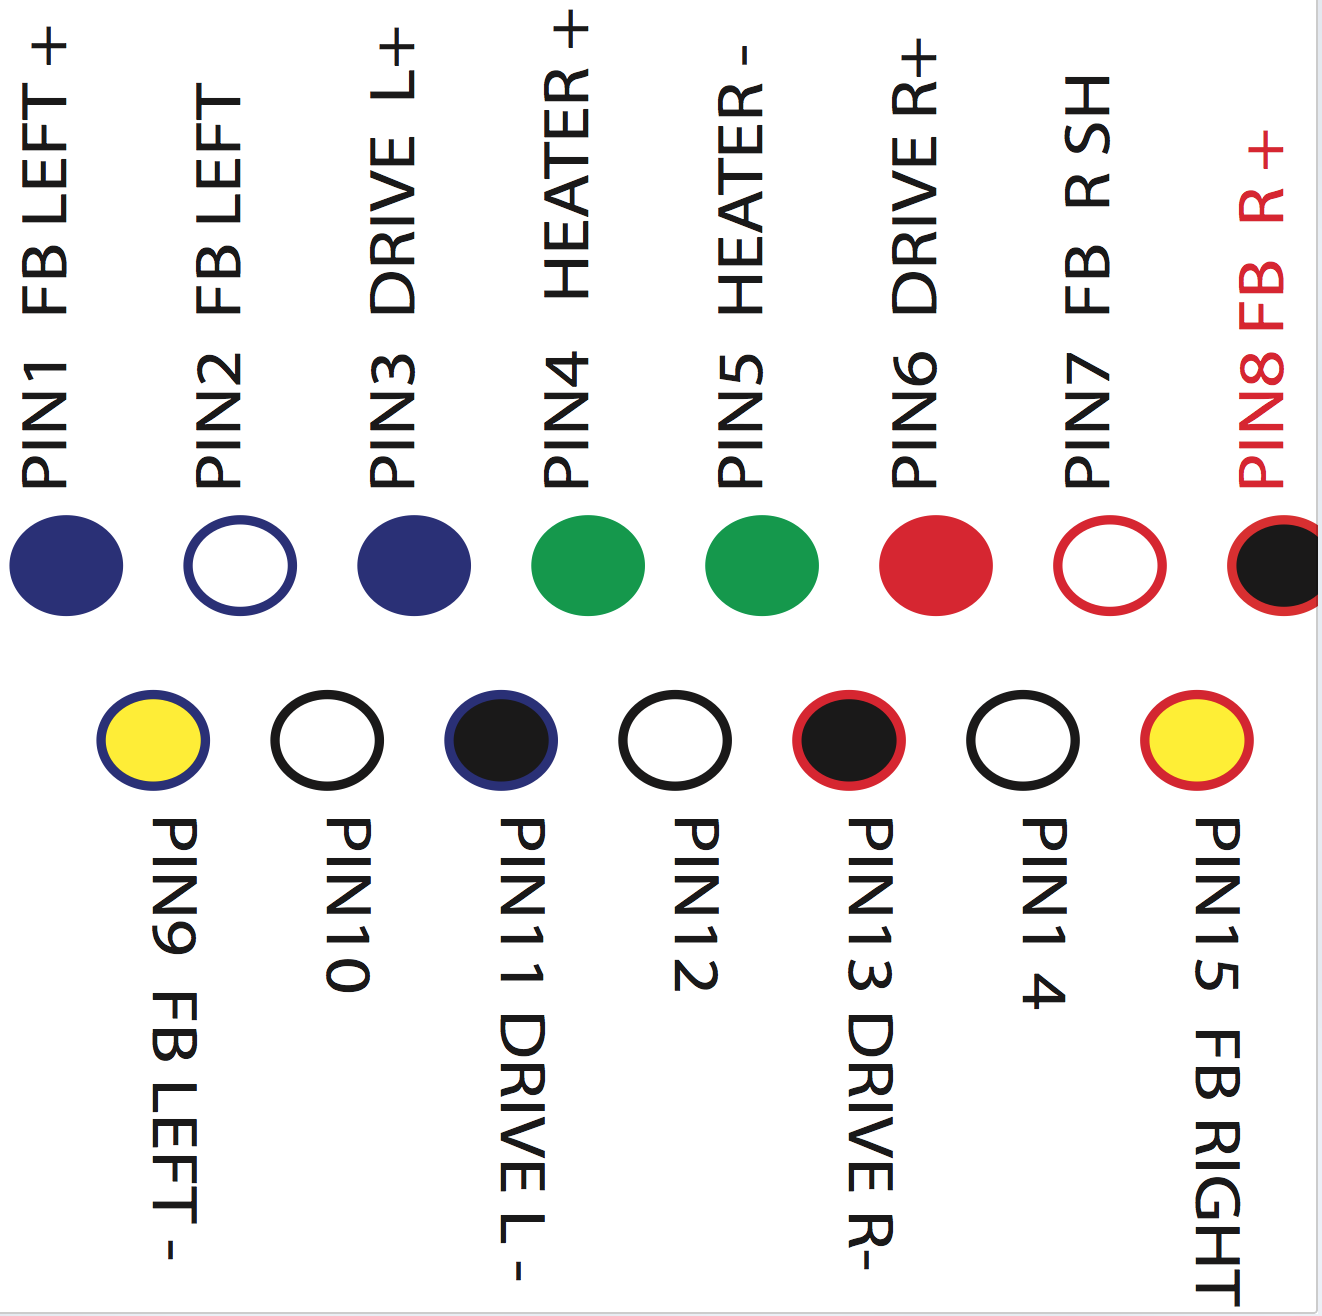
system block schema
caruso wiring block schema
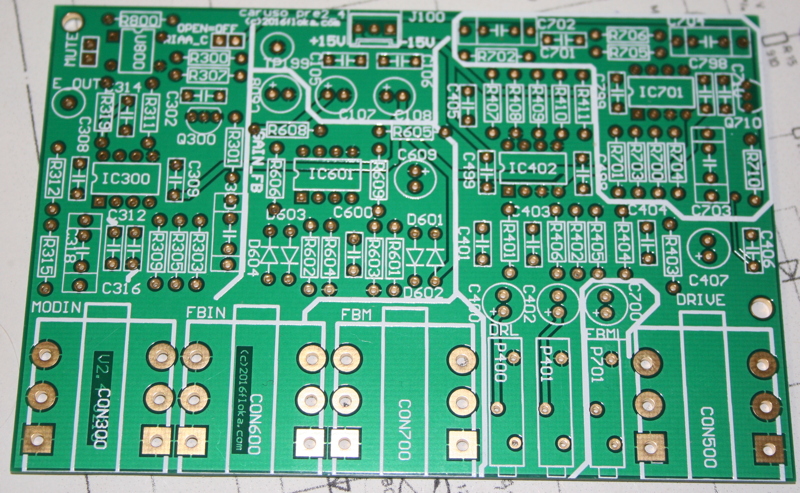
caruso preamp
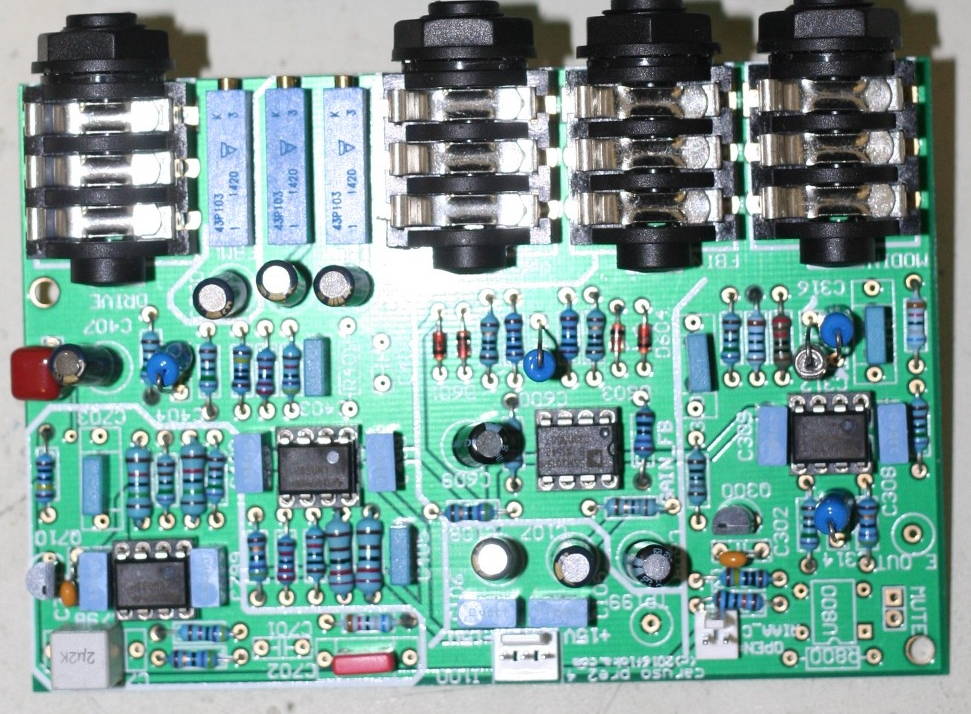
the preamp consists of
- an optional mute or voltage divider with optofet
- a riaa encoder. with switchable 75us (2122Hz) RIAA time constant.
(riaa off= flat from 1khz upwards. lower riaa part is always engaged)
-a feedback preamp
-a mixer and PI regulator
-and a feedback monitor amp. (reverse & switchable 75us RIAA)
all sections are labeled on the new preamp card.
the latest caruso preamp schematic
the parts
the partslist
a pdf how to build that might help. not totally finished yet
building the preamp:
- solder all resistors
- solder all ic sockets
- solder all caps
- solder all the rest
testing the preamp:
use a multimeter to check for short circuits.especially between gnd and +/15V volts.
put in the chips and switch on the power. if you still have +/15V all good.
feed a 1khz 0.2-0.5V tone.
check with a scope on encoder output if you have the signal.
check on mod out if you have the signal
feed a 20khz signal. switch on riaa(= close the bridge) and you should have around 20dB more on encoder out pin
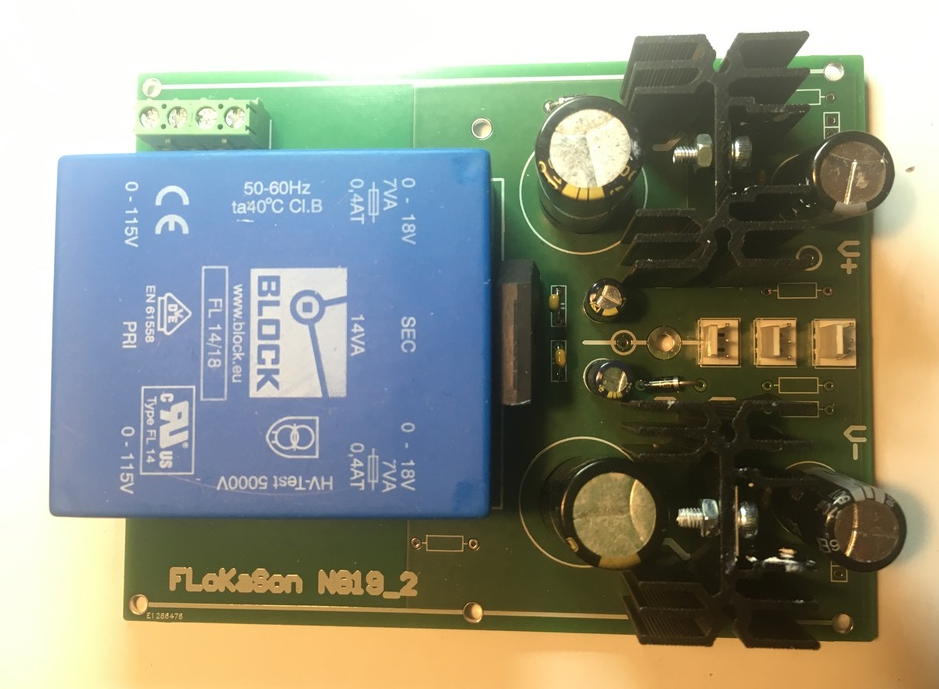
power supply
a simple +/-15V linear power supply is needed. capable to deliver 500mA on each rail.
if you are not familiar with bipolar power supply for opamps. ask someone. it wont work with single supply.
so just buy a 2x15V toroid transformer, add a rectifier , 2 big filter caps and then use LM7815/7915 linear regulators.
the LM317/337 are even a litter better performing and you find fix fertig kits on ebay.
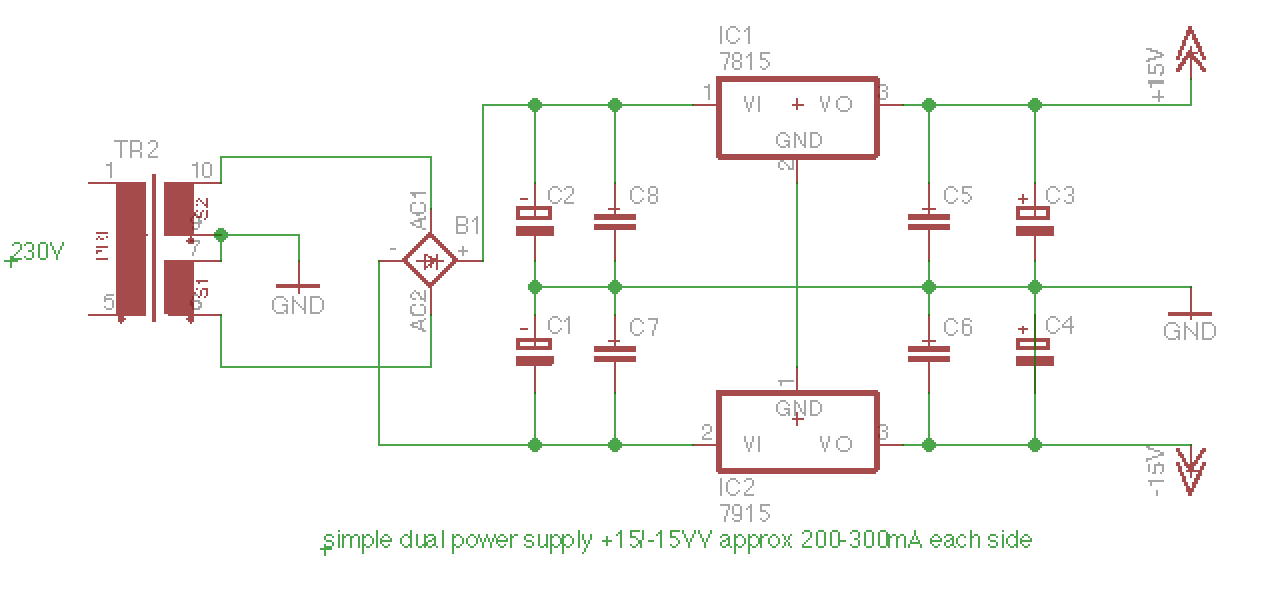

best is to layout your own. or find a kit in owb of those many internet stores for almost nothing.
i normally use my own. but for legal reason i do not sell . neither the kit nor the pcb. do it yourself. its easy
power amp
the power amp needs to be a fast (200-500 kHz) and linear audio amp in the range of 100-300 W.
best with a gain of 26dB.
i dont think that class d class h, digital amps are ok for this job
at the moment most people use successfully the qsc gx3. very good for what it costs. quite stable, unbeatable price and service manual is available.
caution. this amp can provide +/-70V rail to rail that means the same amount as a neumann SAL74 amp
this is way too much . so unless you know what you are doing. dont use. the cutterhead will be gone in seconds
but there are many other amps out and i have no time to test others. please report if you have good results wit other amp
cutterhead cable. rc & fuse box
the cable
the cutterhead drive cable is either twisted pair or regular speaker cable
the feedback cable is symmetric low capacity microphone cable. i use often sommer goblin or some neutrik/contrik cable. check for low cap and high flexibility
dont make the cables longer than 2-3m
dont use ribbon cable. or cheap low quality cable
you need at least one straight cable from the caruso cutterhead to the power amp and Feedback amp.
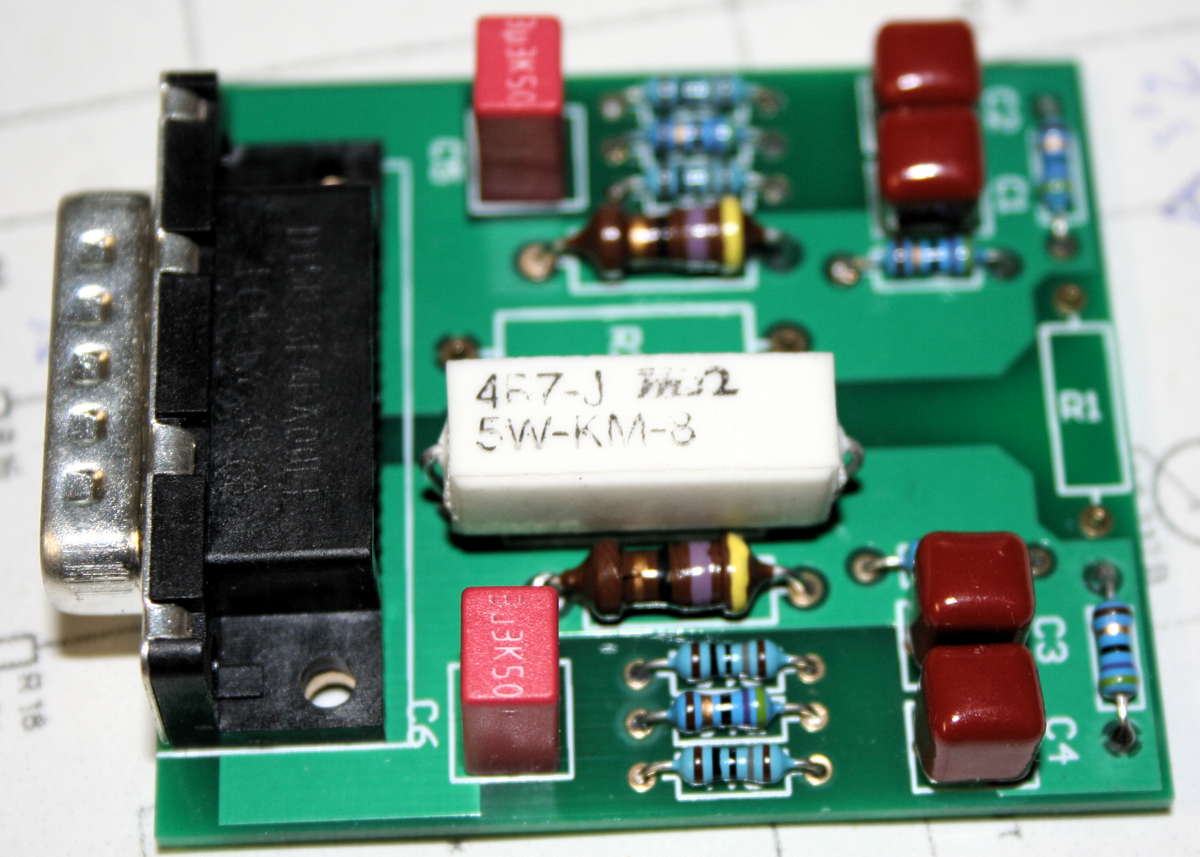
the drive cable needs to have an RC network in series
it is made out of a 2.2uF/200V foil cap and 4.7/4W ohm resistor in parallel.
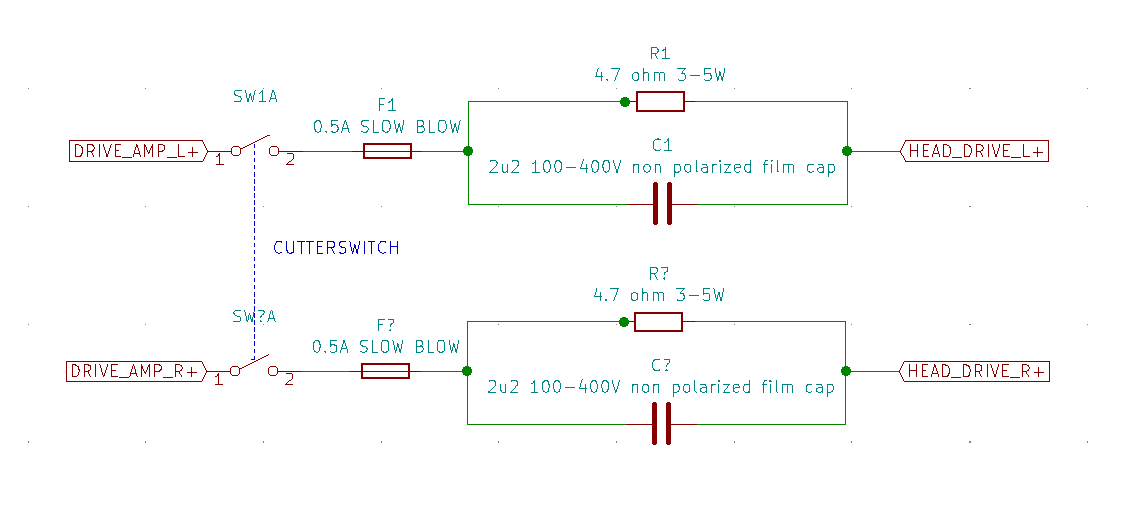
if you have no other protection unit use as a minimum a 0.5A slow blow fuse and use a cutterhead switch to physically disconnect the head
if you are not cutting
check the documents how to do:
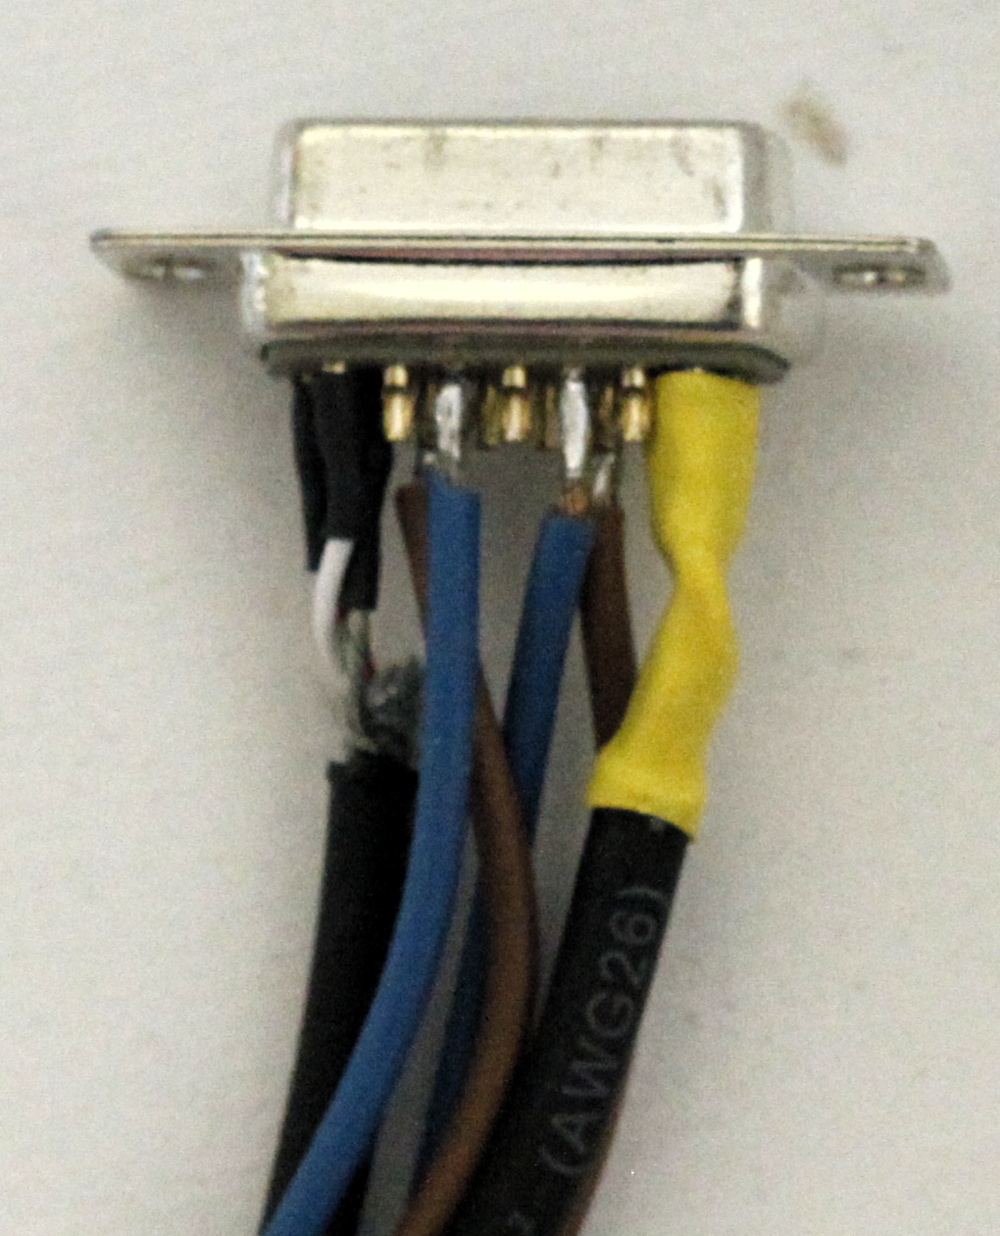
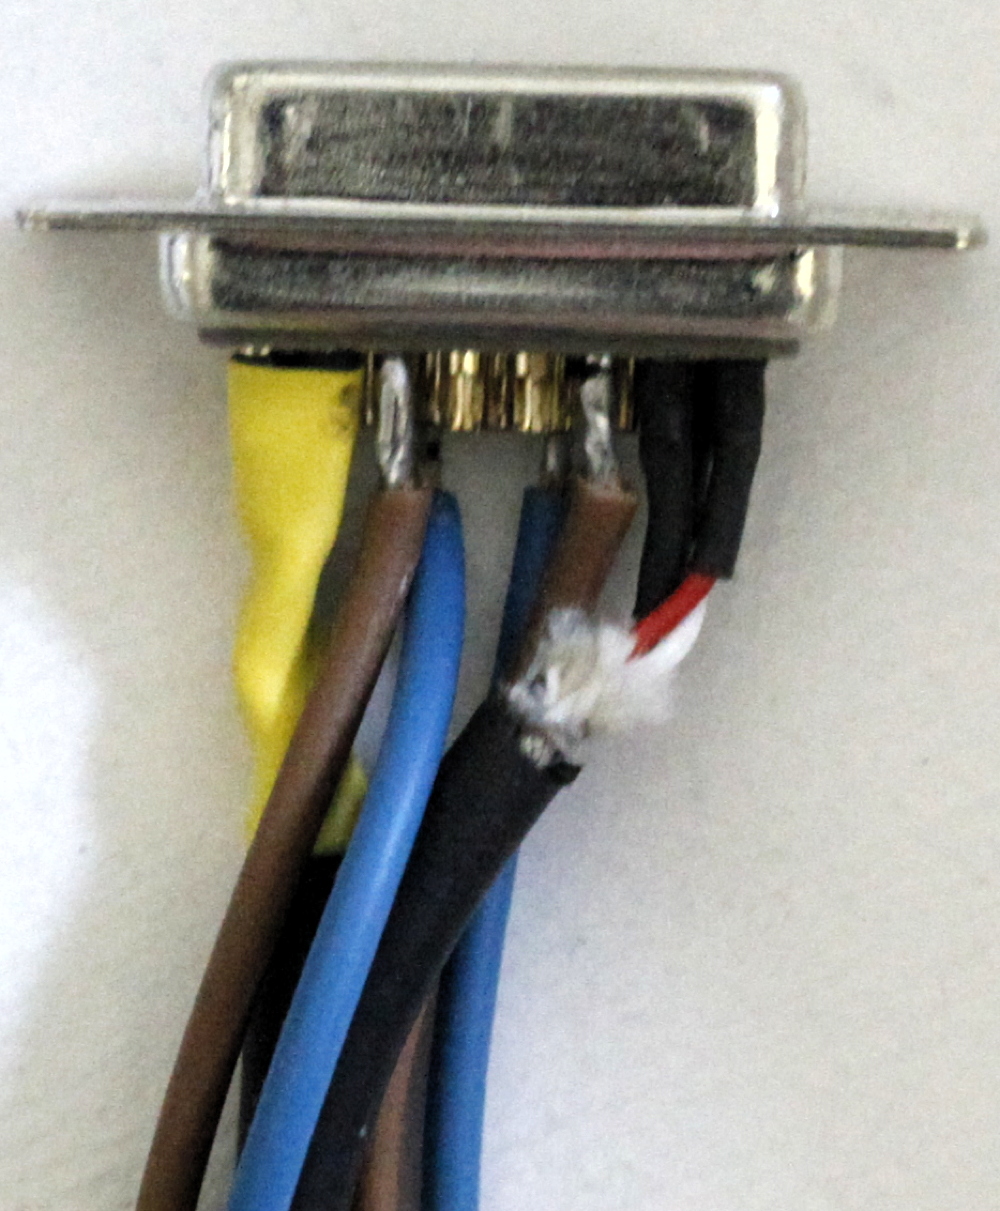
if you want to use on a neumann of flokason suspenion box with 6pin din connectors build a cable like this
twist all pairs. not longer than 6-10cm
how to make the cable for qsc gx3 amp

head
preamp
amp
fuse rc box
the dummy head
for testing your system its always good to have a dummy head.
you can buy a tested working dummyhead or build your own.
here the instructions how to build
how to build the caruso dummy head
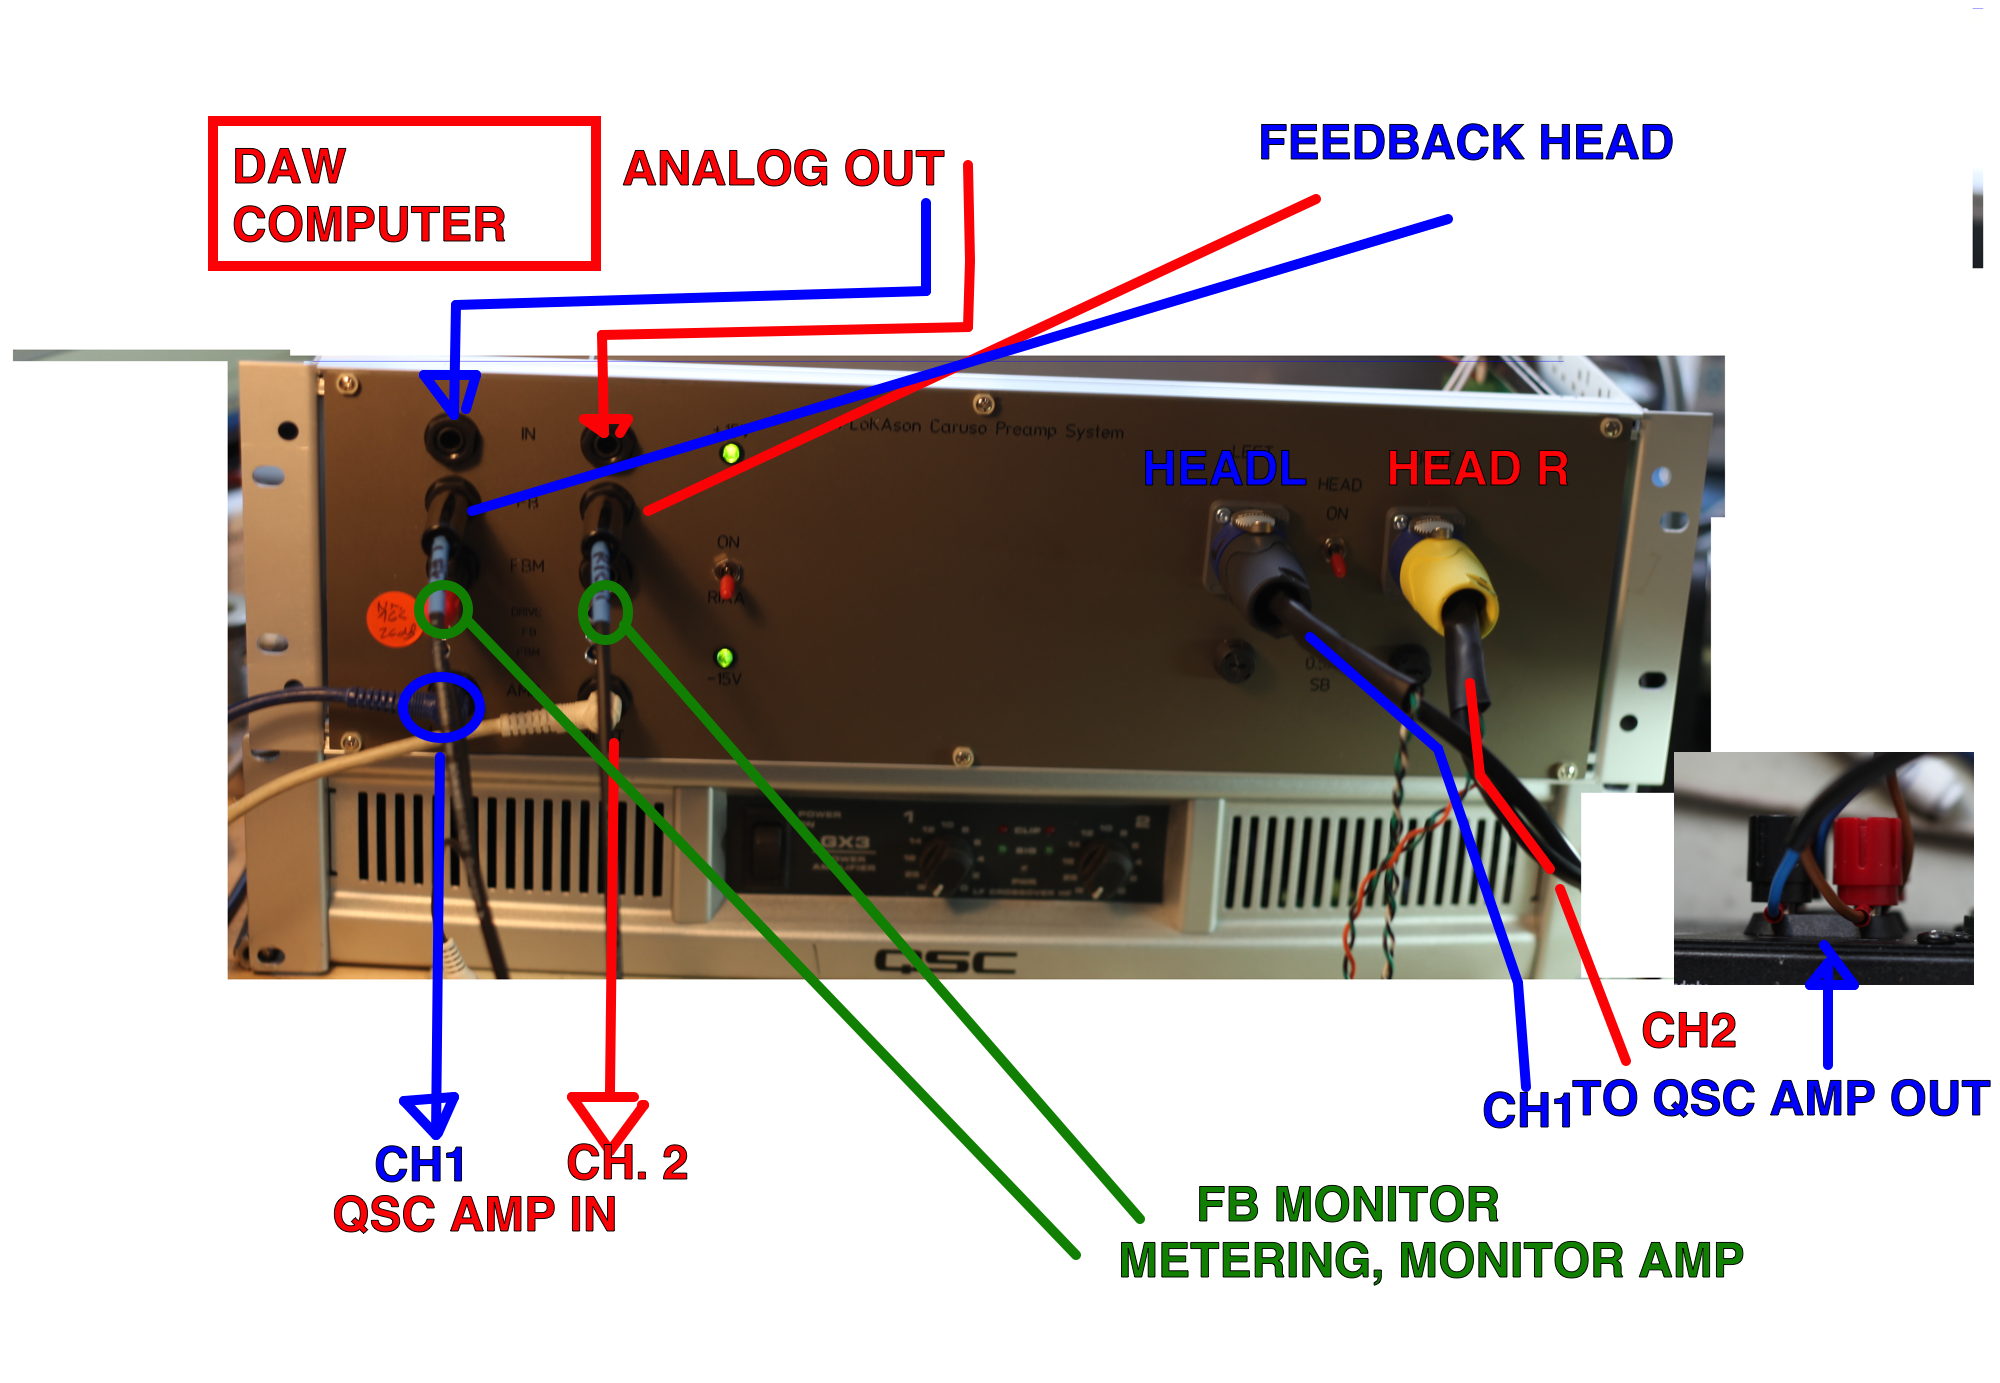
how to connect amps,preamp, DAW, metering basic setup with qsc as an example.
how to calibrate the amps.
check the document
or check the video 78 MB!
thanks alexej for this one. i dont have time to make a better one at the moment.
also notice that he adjusts the feedback in 10db steps. so -10 db increase level adjust another -10db and then the last few dbs.
**********************************
a quick and dirty setup guide******
***********************************
all on your own risk. make sure you know what you do. watch video.
ask people who know. if you have suggestion to make this instructions better. please
let me know. caruso needs support from the community
- make sure all is prepared.
-all cables in
DAC (computer) to input connectors of preamp
FBCable into FB Plug
Mon out to Level Meter (RTW,NTP or whatever). i strongly recommend a NTP or RTW if you have only cheap DJ level dot meter go get a better one

OUT to Power amp
Feedback preamp settings:
RIAA OFF!
poti settings:
FBpoti totally counterclockwise ( until you hear a click) = totally down
Drive Poti totally counterclockwise ( until you hear a click) then 1-2 turn Clockwise
FBMon Poti totally clockwise = fully up
make sure you have 0.5A fuse or lower in the fusebox
use a 1000 Hz tone (-10dB) at least 5 min long . whatever best not full signal
turn gain poti of power amp totally down.
power up preamp
power up power amp
start with left channel.
start 1000 tone
slowly turn on left power amp gain poti to max . you should hear the head.
raise gain poti until its loud. but not crazy loed. if its starts distorting already halfway reduce level of 1000 Hz
tone. maybe -20dB
and read some signal on FBmeter. Ideal you should read a signal between 0dB down to -10 whatever.
then turn FBpoti clockwise slowly. the level on Meter left should go down. and head volume should go down as well.
lets say your meter reads 0 at beginning you should turn Fb up until you have -26-27dB.
i suggest you do it like in the video in 3 steps. so first turn FB up until you reach -10dB.
then you raise Drive Poti so you got 0dB again then you turn up FB again until it reaches -10db (so -10dB + -10dB = -20dB)
then you raise again drivelevel until you reach the 0db reading. then increase Fb so you read -6.
now left channel is set to -26dB
stop tone.
turn down power amp gain poti totally down (unless you have a Head switch, or Head Relais to break connection between amp and head)
do same for right channel.
then
play the 5cm/s test record and attach a meter. read the values. ot mark them on a sticker on the meter.
then cut a 1khz tone mono. both channels.
take the lacquer and play it back on turntable.
compare with the testrecord.
if you read for example left -5db , right +3 dB you need to adjust
drive level. so raise left by 5dB (you dont need to cut you can just watch FBmonitor meter ) and lower 3dB on right
in the end you should reach the same level as with the 5cm/s record.
yes i know 5cm/s is not loud. most studios cut +4 to +6 to this level . but i think its a good stat not to
blow the head during first cuts.
later you can adjust your system that your 0dB level will show -4dB compared to the 5cm/s test record.
FAQ
important sidenote
all information is subject to change without any notice.
there might be errors and mistakes on the schematics and in the documents.
we are not responsible for any damage on you or your equipment because of wrong information on this site.
also we are not responsible for bad records. the world is full of shit. so record nice stuff that makes people happy and dance!
all schematics. pictures and drawings are property of flo@flokason.ch
you can use it under copyleft for non commercial projects and we love to get some feedback, improvements
if you want to make money with any kind of my work. please get in
touch with me. thanks